
This tutorial describes how to upload GitHub documentation to ReadTheDocs and set it up to automatically update whenever a new commit is pushed to GitHub.
Adding the required files to your project
Building documentation on ReadtheDocs requires adding specific files to your project. These files are mandatory for configuring the documentation build process:
-
The requirements.txt file provides Python packages that are needed to build the documentation. In our example, we used:
- myst_nb to build Jupyter Notebooks.
- sphinx_rtd_theme that is the theme used for ReadtheDocs documentation.
-
The conf.py file is essential to build documentation with Sphinx. It defines options such as the theme, extensions to use, and paths to source files to customize the documentation generation process. More information is available on the Sphinx website.
-
The .readthedocs.yaml file is the configuration file used by ReadtheDocs, it indicates how to build and configure the documentation. Below is an example of .readthedocs.yaml file:
# Read the Docs configuration file for Sphinx projects
# See https://docs.readthedocs.io/en/stable/config-file/v2.html for details

# Required
version: 2

# Set the OS, Python version and other tools you might need
build:
  os: ubuntu-22.04
  tools:
    python: "3.12"

# Build documentation in the "docs/" directory with Sphinx
# Provide the path of the conf.py file
sphinx:
  configuration: docs/source/conf.py

# Declare the Python requirements required to build your documentation
# Provide the path of the requirements.txt file
python:
  install:
- requirements: docs/requirements.txt
-
The README.rst file provides a description of the repository.
-
The docs/ directory that contains your documentation source files and configuration.
Connect on ReadTheDocs
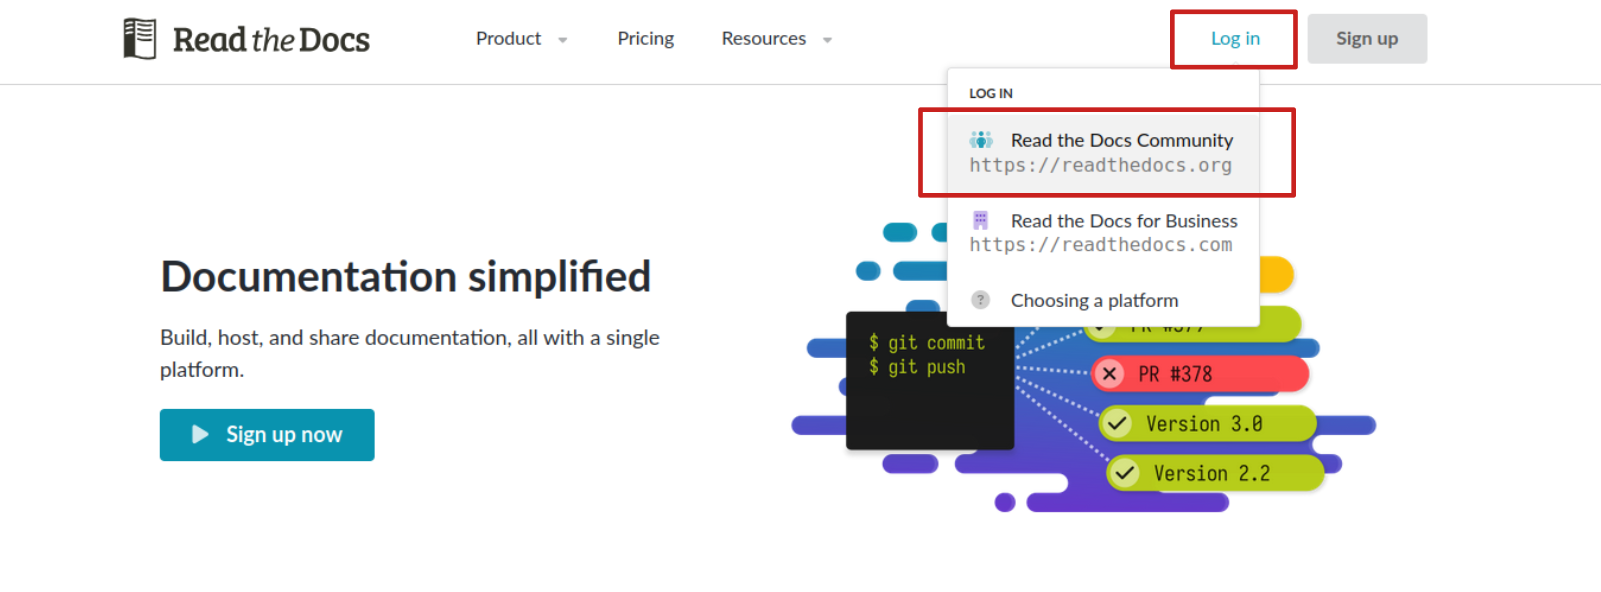
Go on ReadTheDocs and click on «Log In», «Read the Docs Community».
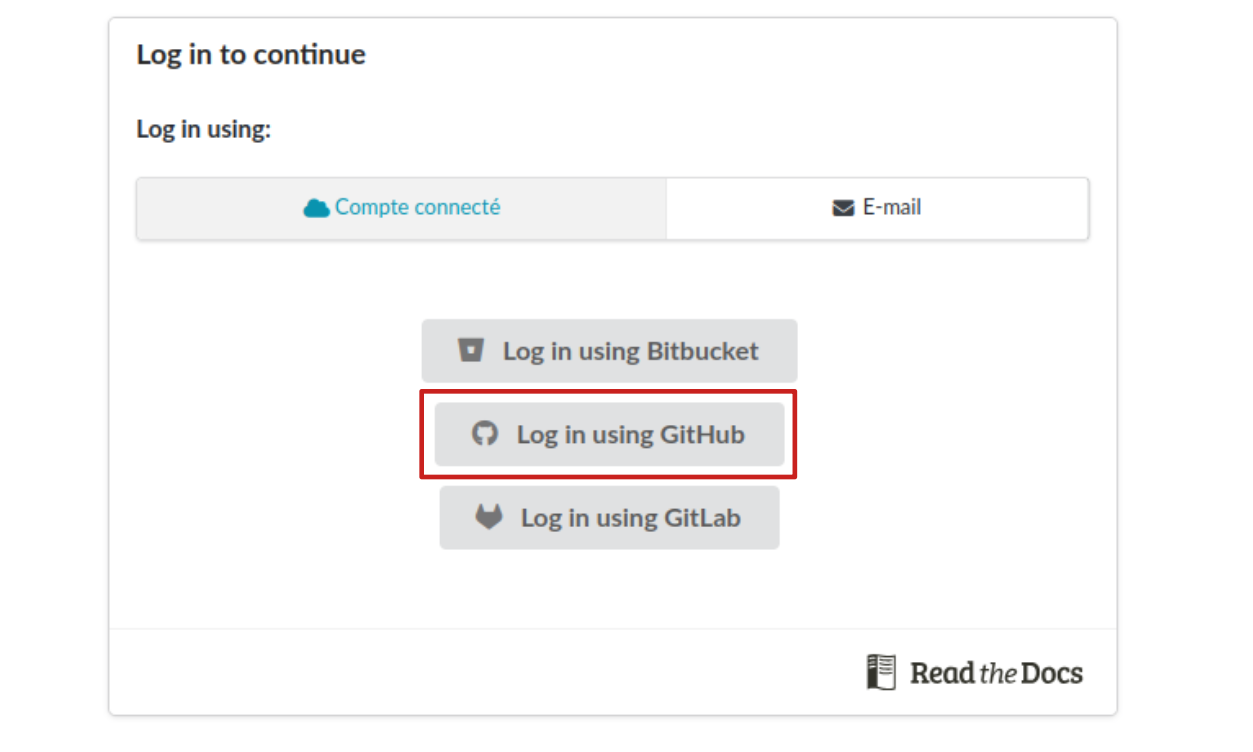
Then, log in with your GitHub account credentials.
Build the documentation from your GitHub repository on Read the Docs
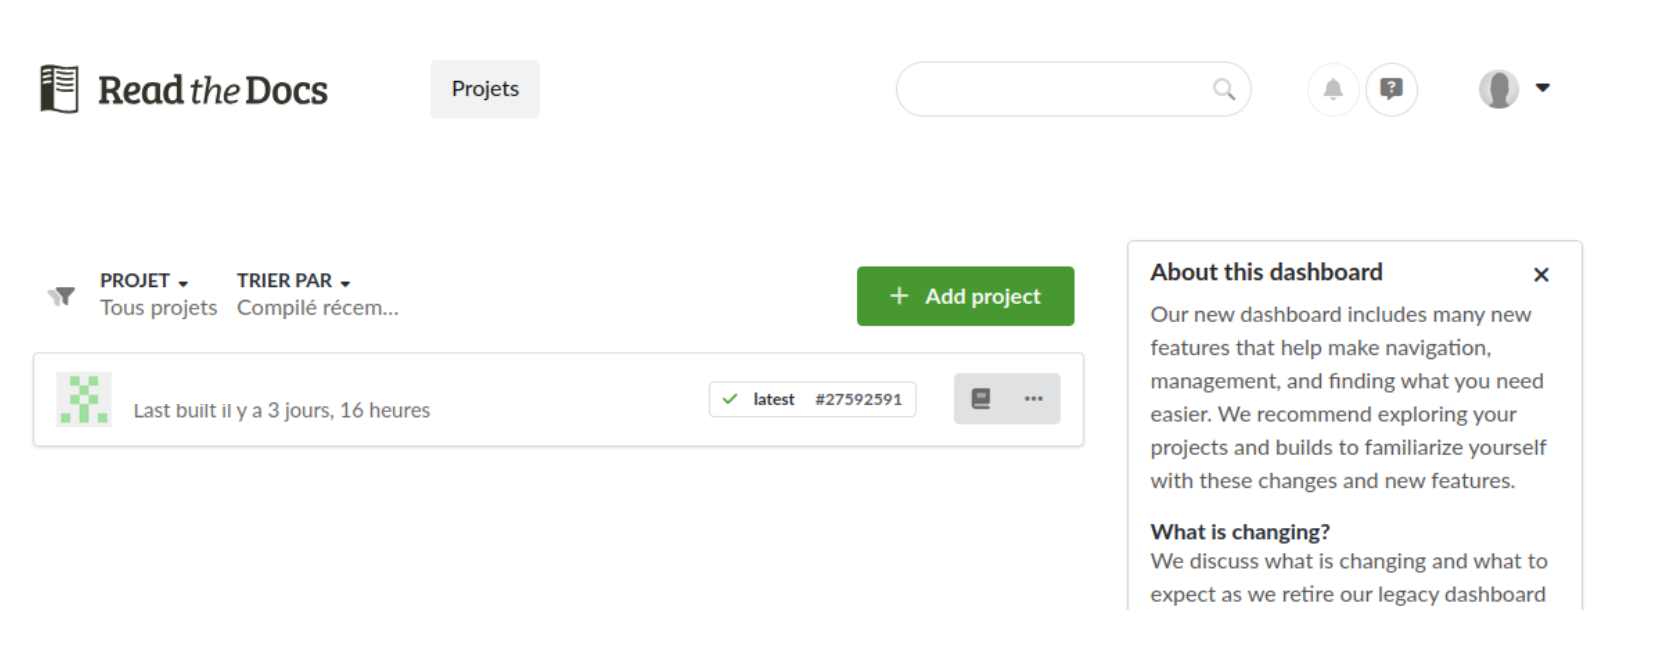
On ReadTheDocs Project page, click on «Add a project».
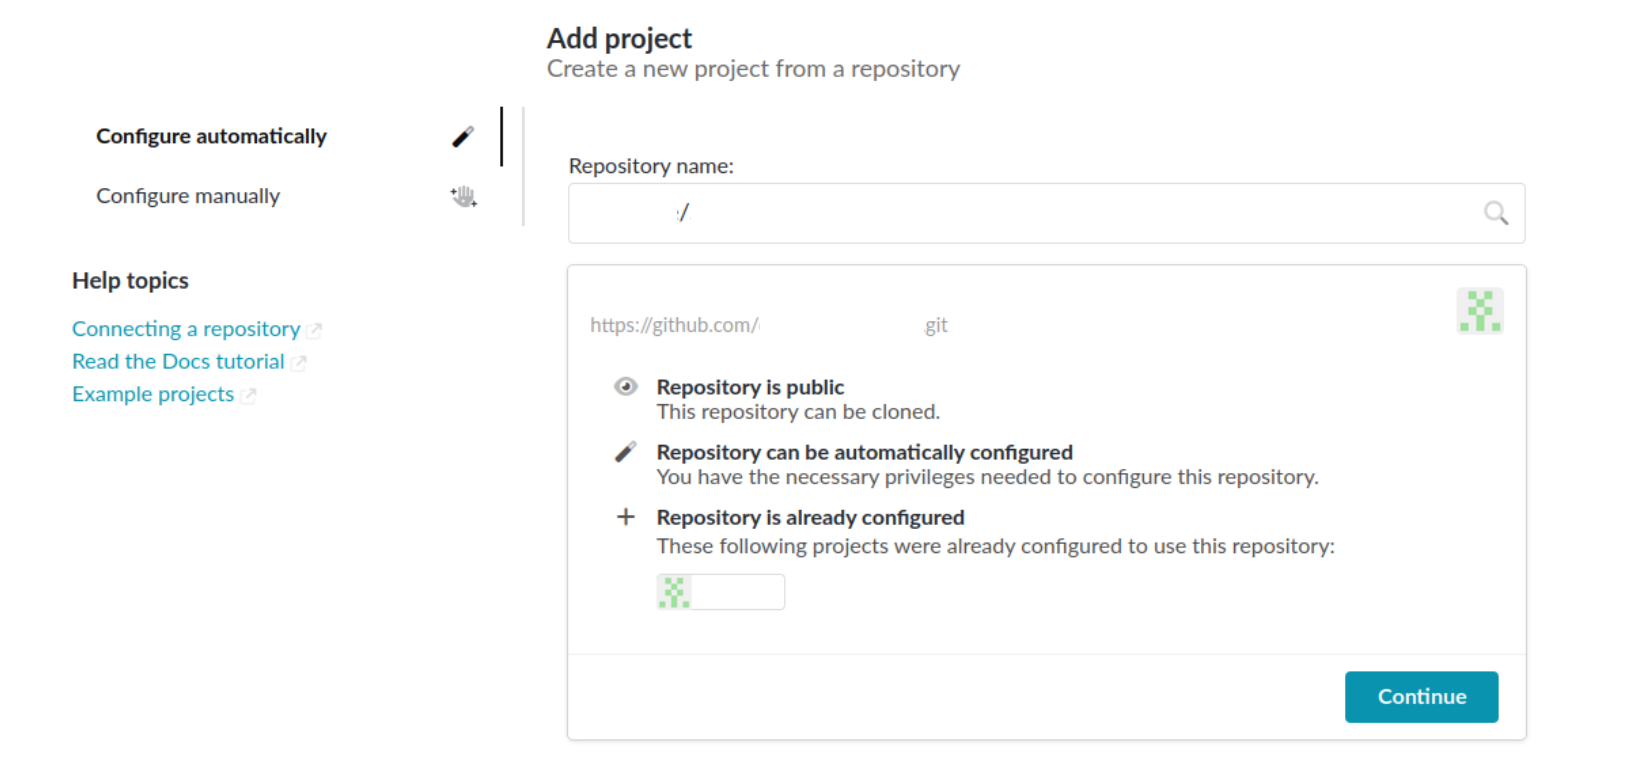
In the "Repository name" field, enter the GitHub repository you want to publish the documentation for. All repositories you have access to with your account should be listed. Then, click "Continue."
ReadTheDocs uses the default GitHub branch to build the documentation. If the default branch on GitHub is not the one you want to use to build the documentation, please update it on GitHub. Then, click "Next."

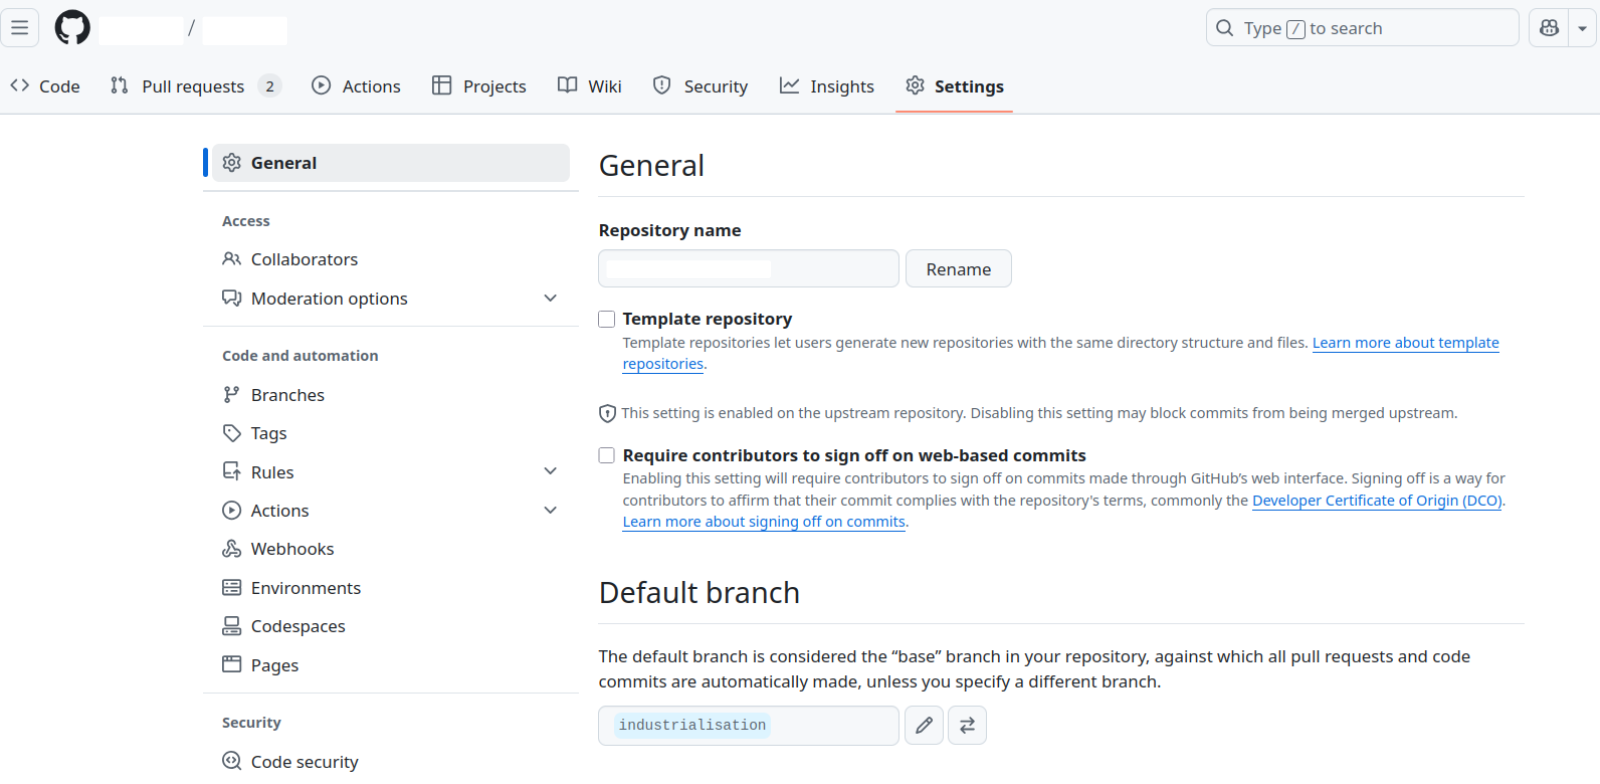
To change the default branch, go to your Github repository.
In the "Settings" tab, you will find a section for the default branch, which is set to "main" by default.
Click on ![]() to select a different default branch.
to select a different default branch.
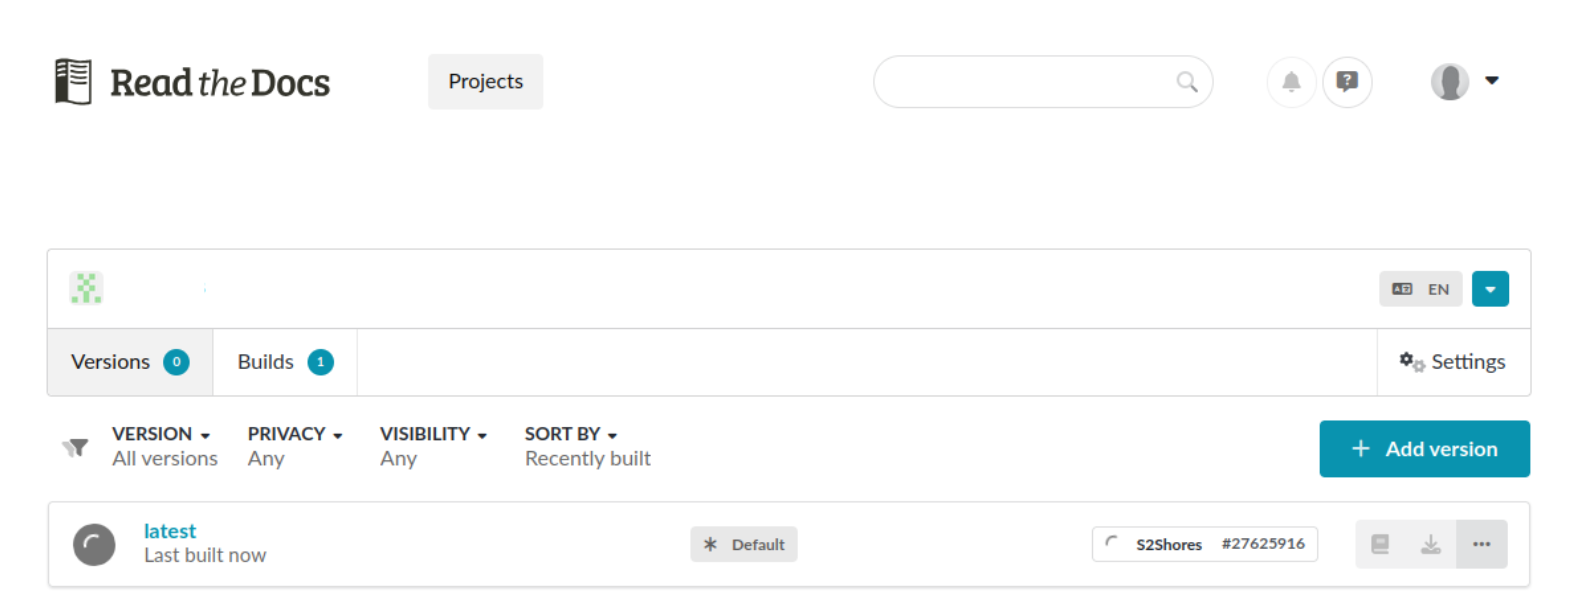
Once your project has been added, it appears in the project page and will start building automatically.
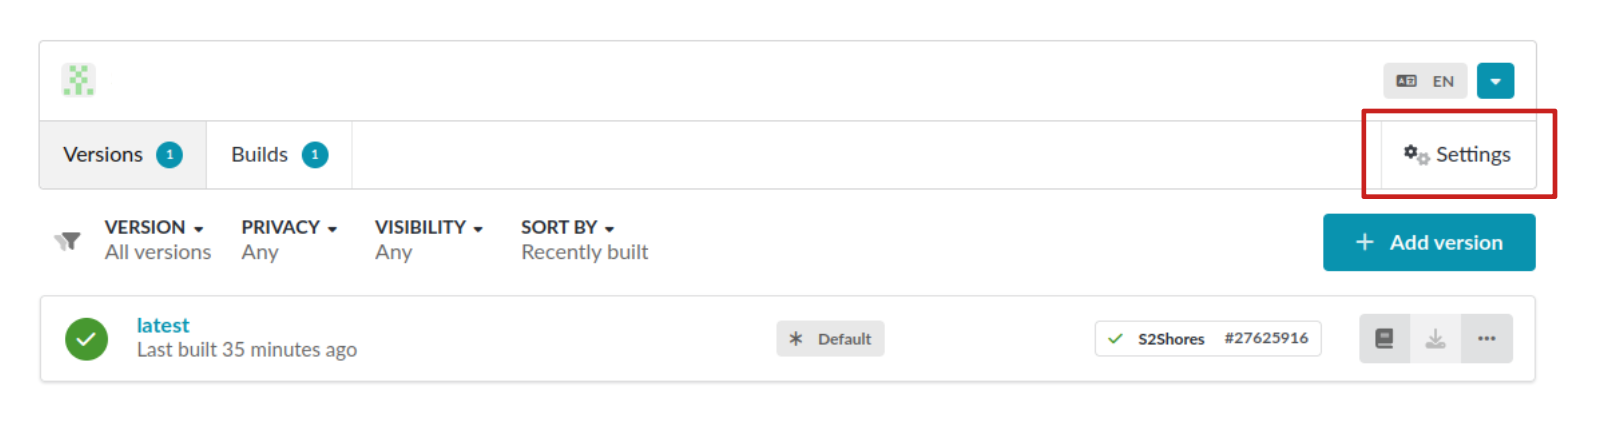
If the documentation builds successfully, this icon will appear.
![]() If an error occurs and this icon appears, please check the build logs to identify the issue.
If an error occurs and this icon appears, please check the build logs to identify the issue.
![]()
Your repository's documentation is now publicly available on ReadTheDocs, and you can access it by clicking on
this icon.
![]()
Triggering documentation builds from pull requests
The documentation is now available, however, you will need to manually rebuild it whenever changes are made. To automate this process, you can configure ReadTheDocs to rebuild the documentation every time a commit is pushed to the repository by setting up a webhook. The webhook ensures that ReadTheDocs triggers a rebuild whenever a new commit is pushed. To set it up, go to the "Settings" on your project page.
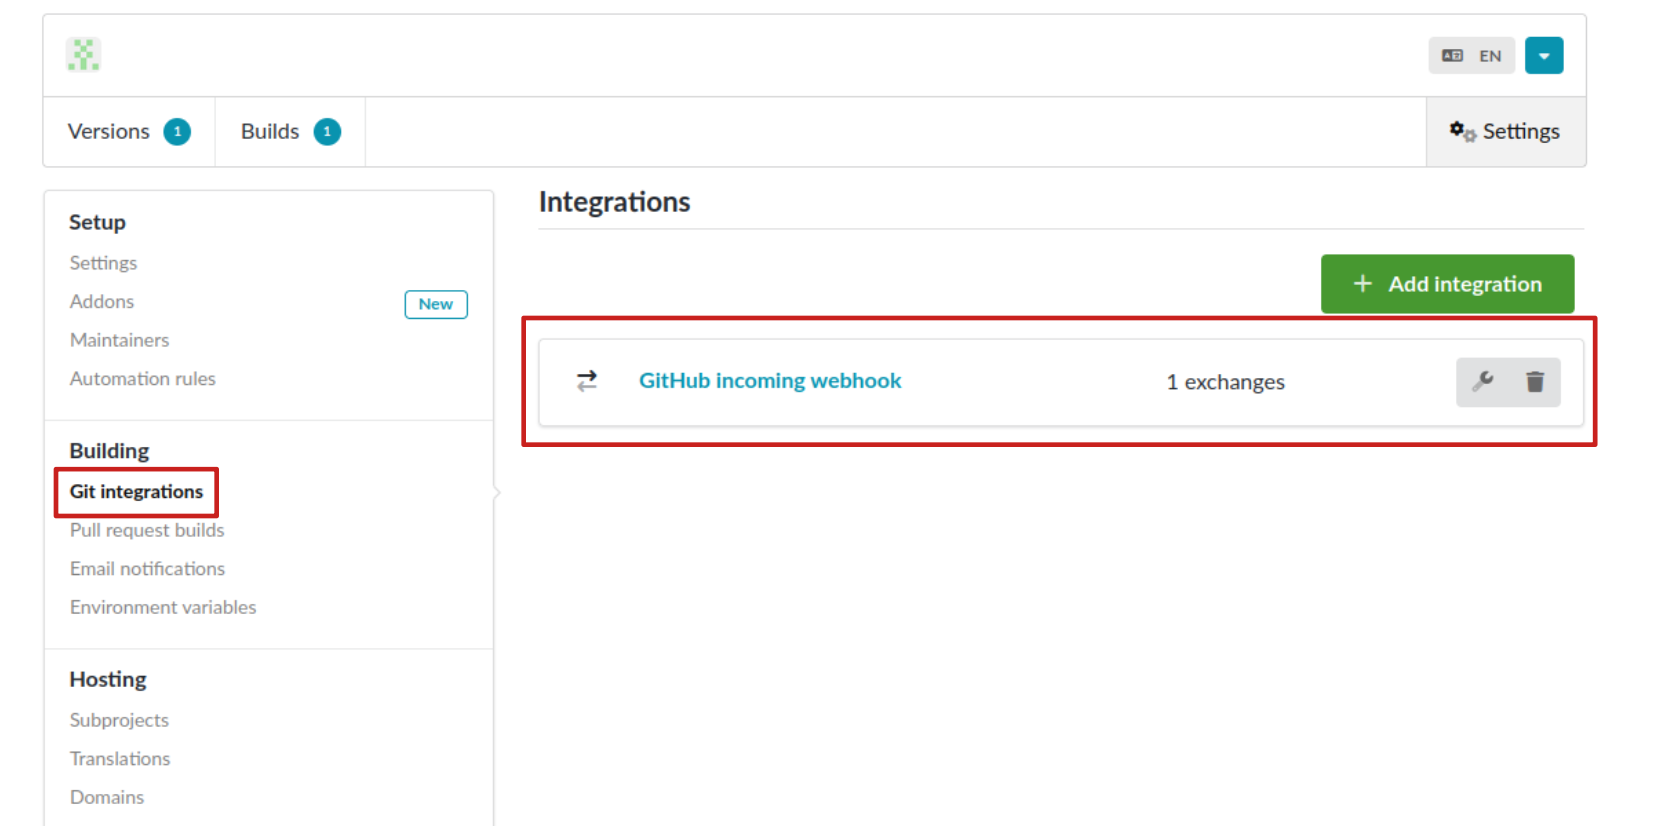
Click on “Git integrations”. If a webhook is already present, click on it. Otherwise, click on “Add Integration” and select “Github incoming webhook” in the “Integration type” field.
The webhook URL and Secret key will appear.

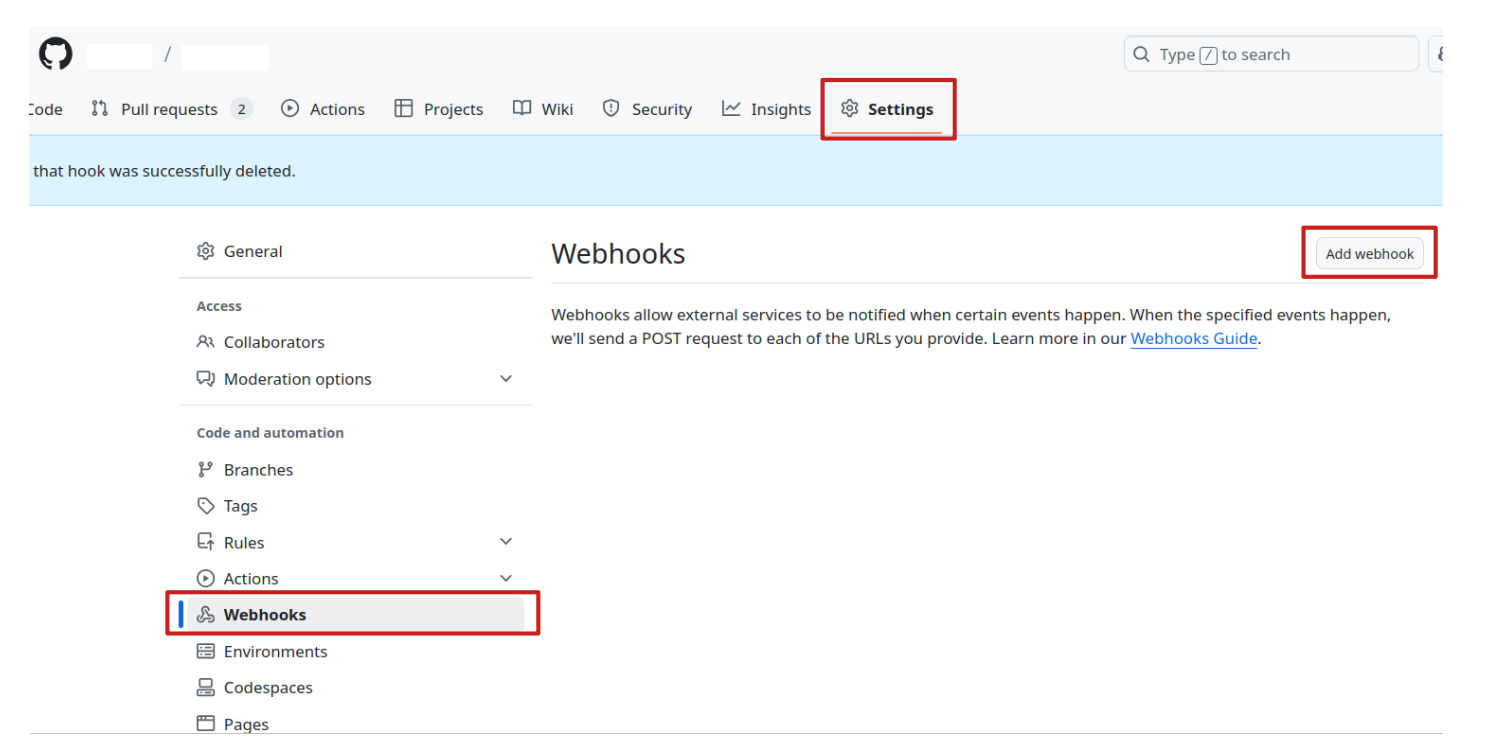
Now, go to your Github repository on Github.com and click on “Settings”, “Webhook” and “Add webhook”.
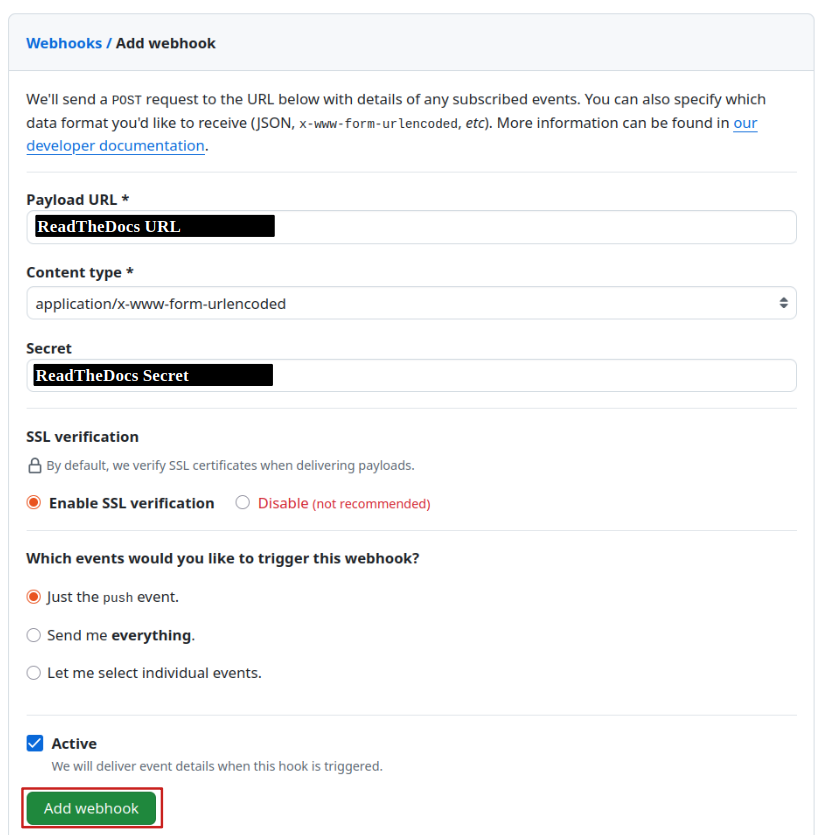
Enter the URL and and the secret key provided by ReadTheDocs in the “Payload URL” and “Secret” fields. Select “application/x-www-form-urlencoded” in the “Content type” field. Please enable SSL verification and select the events that will trigger the webhook. Then, click on “Add webhook”.
Your documentation will now be rebuilt every time a new push is made to the GitHub repository.